概要
今回のブログポストではGetXを使ってBottomSheetを使う方法について説明します。このブログポストで紹介するソースコードは下記のリンクで確認できます。
ブログシリーズ
このブログポストはFlutterでGetXを使う方法についてシリーズとしてまとめています。GetXの他の使い方については下記のリンクを参考してください。
- [GetX] 状態管理
- [GetX] ルート管理
- [GetX] ディペンデンシー管理
- [GetX] 多言語
- [GetX] テーマ
- [GetX] BottomSheet
- [GetX] Dialog
- [GetX] スナックバー
- [GetX] プラットフォームやデバイス情報
GetXのインストール
FlutterでGetXの使い方を確認するため次のコマンドを実行してFlutterの新しいプロジェクトを生成します。
flutter create bottom_sheet
その次、下記のコマンドを実行してGetXパッケージをインストールします。
flutter pub add get
このようにインストールしたGetXを使ってBottomSheetを使う方法について説明します。
BottomSheetを表示
GetXを使ってBottomSheetを使うためにはは次のようにGet.bottomSheet関数を使います。
Get.bottomSheet(
  Widget(),
);
これを確認するため、lib/main.dartファイルを開いて下記のように修正します。
import 'package:flutter/material.dart';
import 'package:get/get.dart';

void main() {
  runApp(const MyApp());
}

class MyApp extends StatelessWidget {
  const MyApp({Key? key}) : super(key: key);

  @override
  Widget build(BuildContext context) {
    return GetMaterialApp(
      title: 'Flutter Demo',
      theme: ThemeData(
        primarySwatch: Colors.blue,
      ),
      home: const MyHomePage(),
    );
  }
}

class MyHomePage extends StatelessWidget {
  const MyHomePage({Key? key}) : super(key: key);

  void openBottomSheet() {
    Get.bottomSheet(
      Column(
        children: [
          const SizedBox(height: 20),
          const Center(
            child: Text(
              'Bottom Sheet',
              style: TextStyle(fontSize: 18),
            ),
          ),
          OutlinedButton(
            onPressed: () {
              Get.back();
            },
            child: const Text('Close'),
          ),
        ],
      ),
      backgroundColor: Colors.white,
      elevation: 0,
      shape: RoundedRectangleBorder(
        borderRadius: BorderRadius.circular(10),
      ),
    );
  }

  @override
  Widget build(BuildContext context) {
    return Scaffold(
      appBar: AppBar(
        title: const Text("BottomSheet"),
      ),
      body: Center(
        child: Column(
          mainAxisAlignment: MainAxisAlignment.center,
          children: [
            const Text('Bottom sheet example'),
            OutlinedButton(
              onPressed: openBottomSheet,
              child: const Text('Open'),
            )
          ],
        ),
      ),
    );
  }
}
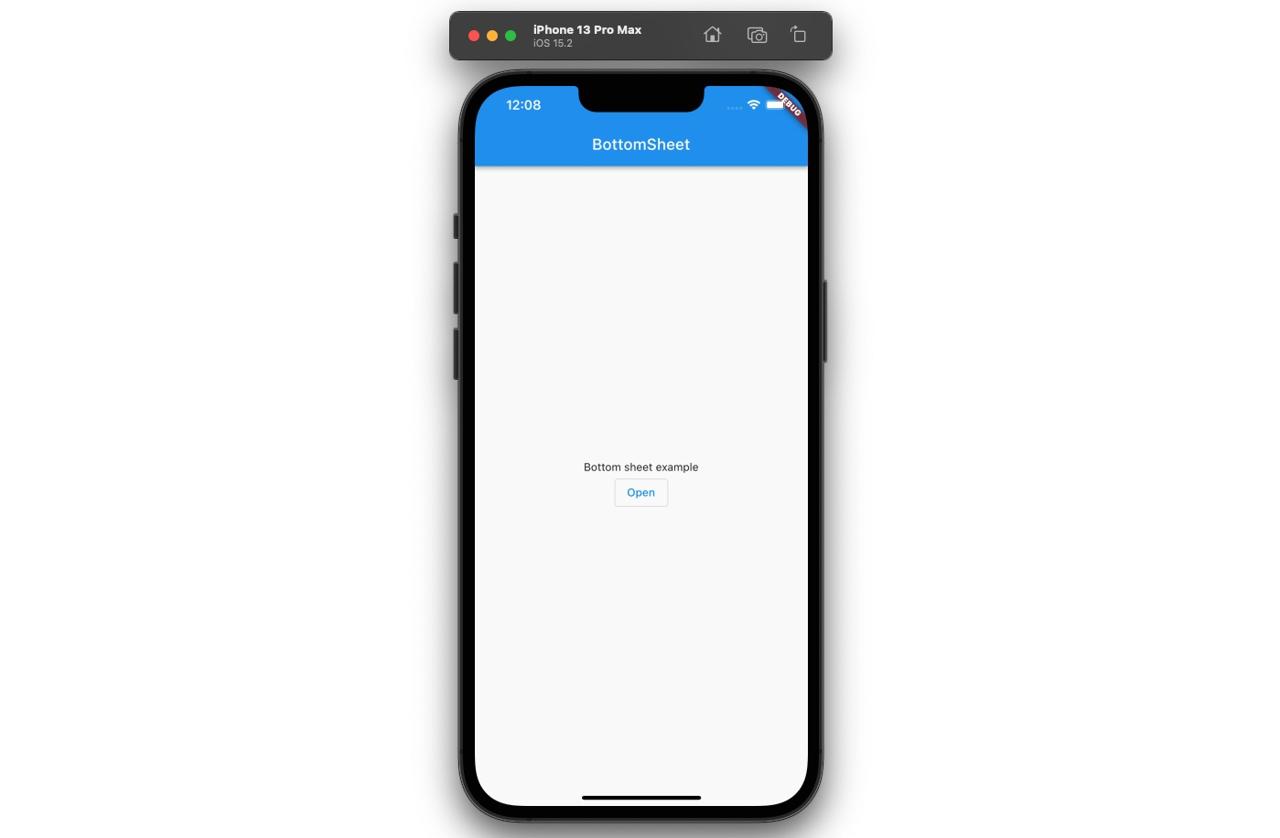
これを実行すると次のような画面が表示されることが確認できます。

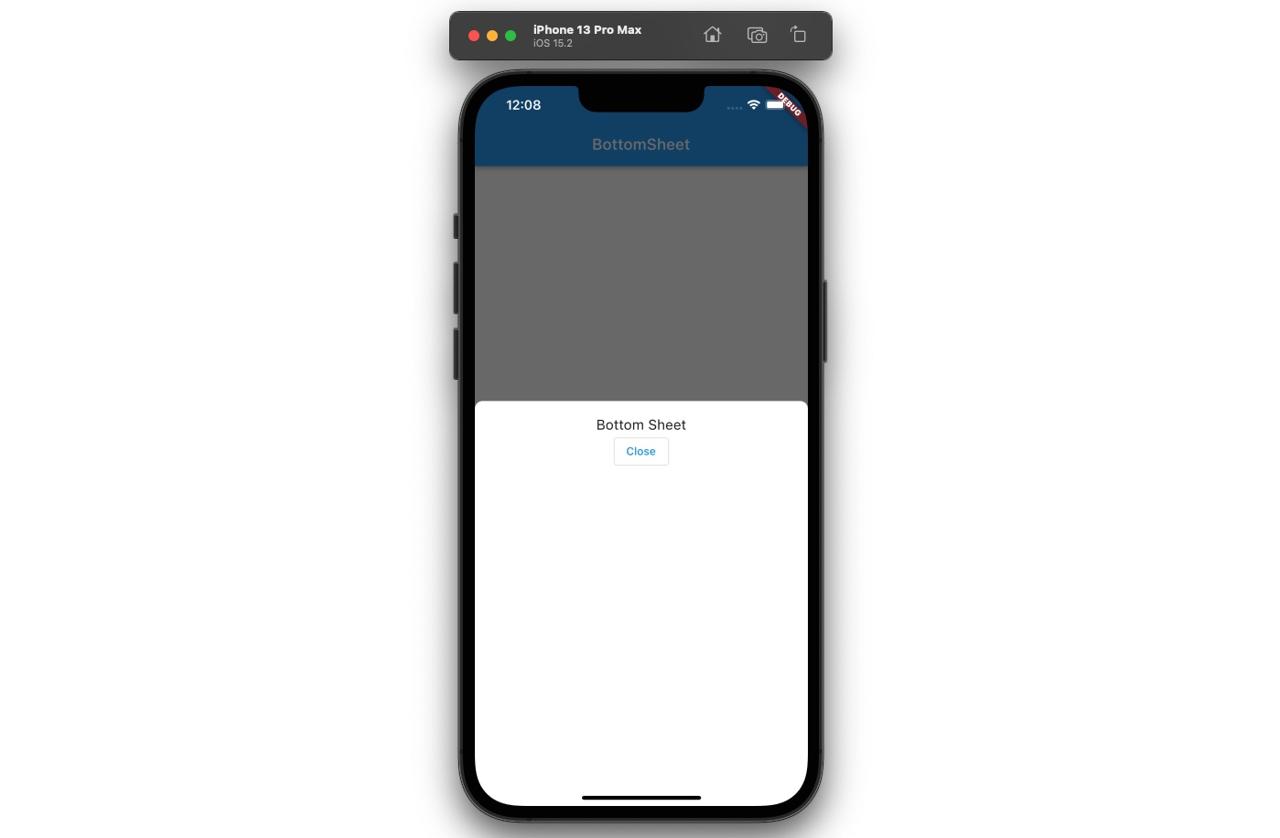
画面に表示されたOpenボタンを押すと次のようにGet.bottomSheetが呼び出されます。
void openBottomSheet() {
  Get.bottomSheet(
    Column(
      children: [
        const SizedBox(height: 20),
        const Center(
          child: Text(
            'Bottom Sheet',
            style: TextStyle(fontSize: 18),
          ),
        ),
        OutlinedButton(
          onPressed: () {
            Get.back();
          },
          child: const Text('Close'),
        ),
      ],
    ),
    backgroundColor: Colors.white,
    elevation: 0,
    shape: RoundedRectangleBorder(
      borderRadius: BorderRadius.circular(10),
    ),
  );
}
その後次のようにBottomSheetが表示されることが確認できます。

BottomSheetを閉じる
画面に表示されたBottomSheetを閉じるためには次のようにGet.back()関数を使います。
Get.back();
例題では次のように閉じるボタンを押す時、Get.back()関数を使えるようにしました。
Get.bottomSheet(
  Column(
    children: [
      ...
      OutlinedButton(
        onPressed: () {
          Get.back();
        },
        child: const Text('Close'),
      ),
    ],
  ),
  ...
);
BottomSheetの確認
GetXでは次のようにBottomSheetが開いてるかどうか確認することができます。
Get.isBottomSheetOpen
これを確認するためopenBottonSheet()関数を次のように修正します。
void openBottomSheet() {
  Future.delayed(const Duration(seconds: 1), () {
    // ignore: avoid_print
    print(Get.isBottomSheetOpen);
  });

  Get.bottomSheet(
    ...
  );
}
これを実行すると1秒後にtrueが表示されることが確認できます。
flutter: true
完了
これでGetXを使ってFlutterでBottomSheetを表示させる方法についてみてみました。また、BottomSheetを閉じるための方法や開いてるかどうかを確認する方法についても確認しました。
私のブログが役に立ちましたか?下にコメントを残してください。それは私にとって大きな大きな力になります!
アプリ広報
Dekuが開発したアプリを使ってみてください。Dekuが開発したアプリはFlutterで開発されています。興味がある方はアプリをダウンロードしてアプリを使ってくれると本当に助かります。


