Outline
In this blog post, I will show how to use Data on Rails. Before using Data, I will introduce how to create Database and Tables. To DB created like this, we will do CRUD(Create Read Update Delete) to understand how to use Data on Rails.
This blog post is a series. You can see the other posts in below.
- Start Ruby on Rails on Mac
- Folder structure in Ruby on Rails
- Add new web page by Ruby on Rails
- Exchange Data between Controller, View and Route
- Use DB on Rails
Also, you can see the this blog post sample source code on Github
DB setting
Before using DB, we need to configure DB setting on Rails. In this blog post, I will only show mysql settings. Also I will not explain how to install mysql on the local.
Rails DB setting file is config/database.yml. When you pen config/database.yml file, you can see the contents like below.
default: &default
  adapter: sqlite3
  pool: <%= ENV.fetch("RAILS_MAX_THREADS") { 5 } %>
  timeout: 5000

development:
  <<: *default
  database: db/development.sqlite3

test:
  <<: *default
  database: db/test.sqlite3

production:
  <<: *default
  database: db/production.sqlite3
Rails basically is configured sqlite3. we will use mysql, so modify this file like below.
default: &default
  adapter: mysql2
  encoding: utf8
  database: study_rails
  pool: 5
  username: root
  password:
  socket: /tmp/mysql.sock

development:
  <<: *default

test:
  <<: *default

production:
  <<: *default
In above, modify database, username, password fields for your local enviroment. If you want to set sepcific information for specific environment, modify it like below.
production:
  <<: *default
  username: root
  password: XXXX
If you modify like above, in production enviroment, Rails uses username and password above.
You can use the parameters below for DB settings.
| name | description |
|---|---|
| adapter | Database type(sqlite3, mysql2, postgresql, etc) |
| database | Database name(sqlite: database file path) |
| host | Host name or IP address |
| port | Port number |
| pool | Access pool |
| timeout | Access timeout(millisecond) |
| encoding | Character encoding사용할 문자 코드 |
| username | Database user name |
| password | Database password |
| socket | Socket (/tmp/mysql.sock) |
mysql2
To use Mysql on Rails, we need to install mysql2 gem. Execute the command below to install mysql2.
bundle add mysql2
After installing, Execute the command below to create Database.
bundle exec rake db:create
If you get the error message like below and Database is not created,
warning: Using the last argument as keyword parameters is deprecated; maybe ** should be added to the call
The called method `initialize' is defined here
[BUG] Segmentation fault at 0x0000000000000000
...
Execute the command below to install mysql2
gem install mysql2 -- --with-ldflags=-L/usr/local/opt/openssl/lib --with-cppflags=-I/usr/local/opt/openssl/include
And then execute the command below to create Database.
bundle exec rake db:create
If Database is created well, you can see the message like below.
Created database 'study_rails'
Database 'study_rails' already exists
Create Model
we’ve created Database, so let’s create Table for saving Data. We need to create Model first to create Table on Rails.
Execute the command below to create Model
# bundle exec rails generate model post
bundle exec rails g model post
After creating, you can see the folders and file are created like below.
├── app
│   ├── models
│   │   ├── post.rb
├── db
│   ├── migrate
│   │   ├── 20200315053129_create_posts.rb
├── test
│   ├── fixtures
│   │   ├── posts.yml
│   ├── models
│   │   ├── post_test.rb
- app/models/post.rb: Model connected with Table.
- db/migrate/20200315053129_create_posts.rb: Migraion file to create Table.
- test/fixtures/posts.yml: Dummy data for testing
- test/models/post_test.rb: Unit test file for Model
Create Table
Let’s create Table to save Data on Database. We need to modify Migration file to create Table on Database.
To create posts table, open db/migrate/20200315053129_create_posts.rb file and modify it like below.
class CreatePosts < ActiveRecord::Migration[6.0]
  def change
    create_table :posts do |t|
      t.string :title
      t.text :content
      t.timestamps
    end
  end
end
This posts table basically has String type of title, and Text type of content for saving a long text.
bundle exec rake db:migrate
Also, when you execute the command above to create Table, you can see db/schema.rb file. When you open db/schema.rb file, you can see the contents like below.
ActiveRecord::Schema.define(version: 2020_03_15_053129) do

  create_table "posts", options: "ENGINE=InnoDB DEFAULT CHARSET=utf8", force: :cascade do |t|
    t.string "title"
    t.text "content"
    t.datetime "created_at", precision: 6, null: false
    t.datetime "updated_at", precision: 6, null: false
  end

end
Also you can see the Table created well via Database tool like below.

After creating Table via Migration, you can execute the command below to rollback.
bundle exec rake db:rollback
CRUD
Now, we will do CRUD(Create Read Update Delete) in the Table we’ve created above.
Create
To create Data, Open app/controllers/home_controller.rb file and modify it like below.
class HomeController < ApplicationController
    ...
    def form

    end
end
This action is form to get user input. To create View for this form Action, create app/views/home/form.erb file and modify it like below.
<a href="/list">Go back</a><br/>
<form action="/create" method="POST">
  <input type="hidden" name="authenticity_token" value="<%= form_authenticity_token %>" />
  <label for="title">title:</label>
  <input type="text" name="title" />
  <label for="content">content:</label>
  <input type="text" name="content" />
  <input type="submit" />
</form>
If the user clicks Submit button, the data will be sent to /create URL via POST request.
And then, to register this URL to Route, open config/routes.rb file and modify it like below.
Rails.application.routes.draw do
  ...
  get '/form', to: 'home#form'
end
And then, to check it, execute the command below to start Rails server.
bundle exec rails s
When you open http://127.0.0.1:3000/form on the browser, you can see the screen like below.

Let’s make it to get the data and to save it. Open app/controllers/home_controller.rb file and modify it like below.
class HomeController < ApplicationController
    ...
    def create
        post = Post.new
        post.title = params[:title]
        post.content = params[:content]
        post.save

        redirect_to '/list'
    end

    def list

    end
end
Let’s see the details.
post = Post.new: Prepare to create new Data via Post model we’ve created.post.title = params[:title]: Insert the title that the user input to Post title.post.content = params[:content]: Insert the content that the user input to Post content.post.save: Lastly, by saving the data, create the data on Database.redirect_to '/list': After creating, redirect to/listURL.def list: For preventing an error is not occurred after redirecting, add an empty Action. We will modify it to show Data after.
As you can see the above, create action is to redirect, so View is not required. However, list action, that will show Data, needs View, so create app/views/home/list.erb file.
To use these Actions, open config/routes.rb file and modify it like below.
Rails.application.routes.draw do
  ...
  post '/create', to: 'home#create'
  get '/list', to: 'home#list'
end
And insert Data on http://127.0.0.1:3000/form and click the Submit button. You can see the URL is redirected to http://127.0.0.1:3000/list. Also, You can see the data is created well via Database tool.

Read
Let’s read the data, and show it on the browser. Open app/controllers/home_controller.rb file and modify it like below.
class HomeController < ApplicationController
    ...
    def list
        @posts = Post.all
    end
end
In above, we got all data on Post table via Post.all. To send this data to View, we saved Instance variable named @posts.
To display this data, Open app/views/home/list.erb file and modify it like below.
<style>
table, th, td {
  border: 1px solid black;
}
</style>
<a href="/form">Create New Post</a>
<table>
    <thead>
        <tr>
            <th>Title</th>
            <th>Content</th>
            <th>Action</th>
        </tr>
    </thead>
    <tbody>
        <% @posts.each do |post| %>
        <tr>
            <td><%= post.title %></td>
            <td><%= post.content %></td>
            <td></td>
        </tr>
        <% end %>
    </tbody>
</table>
Here, the important part is the code below that loops to assign post variable from @posts Instance variable.
<% @posts.each do |post| %>
...
<% end %>
Get and display title and content from post variable.
<td><%= post.title %></td>
<td><%= post.content %></td>
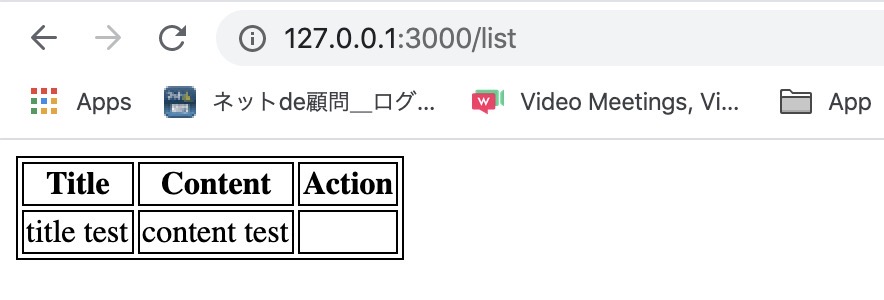
After this, when you open http://127.0.0.1:3000/list on the browser, you can see the data is shown well like below.
Update
Let’s update the data we’ve created above. Open app/controllers/home_controller.rb file and modify it like below.
class HomeController < ApplicationController
    ...
    def modify
        @post = Post.find(params[:id])
    end
end
In the above, modify action provides a Form for users to update the data. Get id that the user wants to modify, find the data from this id(Post.find), send this data to View by assigning the Instance variable(@post).
To provide the Form to the user to update the data, open app/views/home/modify.erb file and modify it like below.
<a href="/list">Go back</a><br/>
<form action="/update/<%= @post.id %>" method="POST">
  <input type="hidden" name="authenticity_token" value="<%= form_authenticity_token %>" />
  <label for="title">title:</label>
  <input type="text" name="title" value="<%= @post.title %>"/>
  <label for="content">content:</label>
  <input type="text" name="content" value="<%= @post.content %>" />
  <input type="submit" />
</form>
It similars app/views/home/form.erb that we’ve made to create the data. The different part is value in the Input tag that display the data from the Controller.
<input type="text" name="title" value="<%= @post.title %>%"/>
<input type="text" name="content" value="<%= @post.content %>%" />
Let’s configure Route to show this page. Open config/routes.rb file and modify it like below.
Rails.application.routes.draw do
  ...
  get '/modify/:id', to: 'home#modify'
end
The modify View, that is for editing the data, uses URL parameter. Get id via URL, find the Data using id in Controller, and disply it on the browser.
Let’s add the link to open modify page. Open app/views/home/list.erb file and modify it like below.
...
<table>
    <thead>
        ...
    </thead>
    <tbody>
        <% @posts.each do |post| %>
        <tr>
            <td><%= post.title %></td>
            <td><%= post.content %></td>
            <!-- add this line -->
            <td><a href="/modify/<%= post.id %>">modify</a></td>
        </tr>
        <% end %>
    </tbody>
</table>
And then, open http://127.0.0.1:3000/list on the browser. You can see the data is shown well like below.
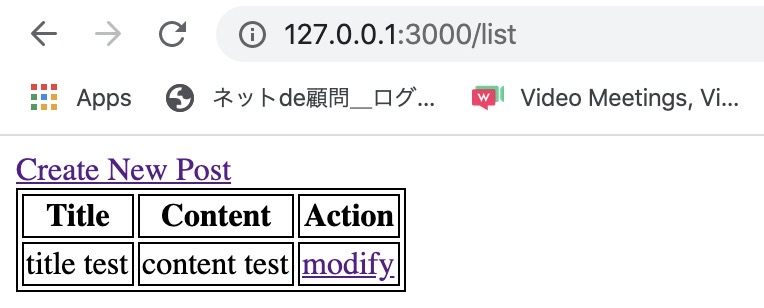
Here, when you click modify link, you can see the screen like below.
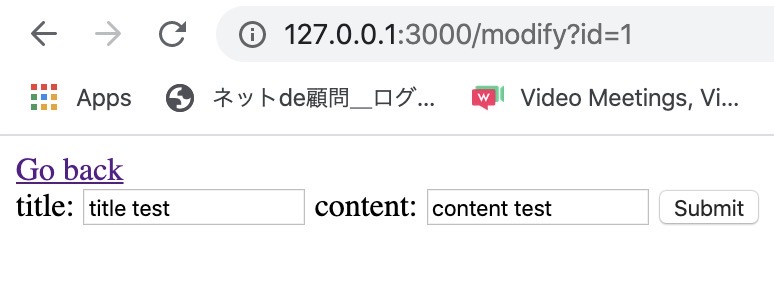
Let’s make update action to update the data. We’ve made to click the Submit button in modify page to go to the /update/:id.
<a href="/list">Go back</a><br/>
<form action="/update/<%= @post.id %>" method="POST">
  ...
</form>
To make this action, open app/controllers/home_controller.rb file and modify it like below.
class HomeController < ApplicationController
    ...
    def update
        post = Post.find(params[:id])
        post.title = params[:title]
        post.content = params[:content]
        post.save

        redirect_to '/list'
    end
end
Get id from the parameter and get the data using the id. Update the saved data by title and content that the user inputs, and then, update it via post.save. Lastly, after updating the data, redirect to /list page.
Let’s add an URL to use this action in Route. Open config/routes.rb file and modify it like below.
Rails.application.routes.draw do
  ...
  post '/update/:id', to: 'home#update'
end
This route will get id via URL parameter, and get the data that user inputs through the Post method.
Go to the modify page,

Input the different contents like below.
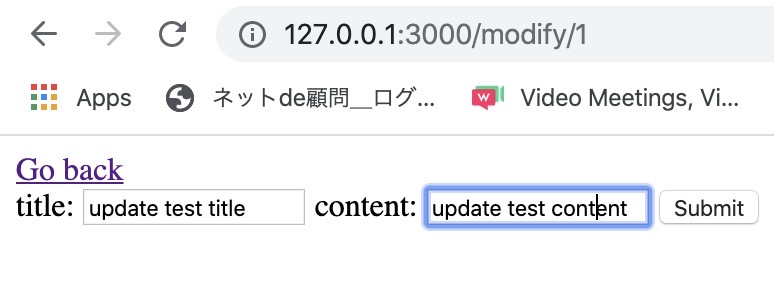
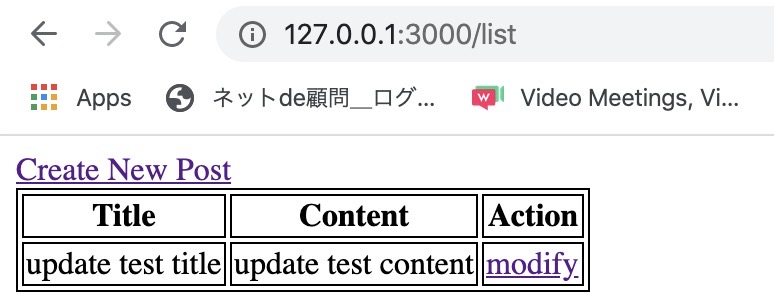
And then, when you click the Submit button, you can see the data is updated well like below.
Delete
Let’s see how to delete the data that is last of CRUD. To add an action to delete the data, open app/controllers/home_controller.rb file and modify it like below.
class HomeController < ApplicationController
    ...
    def delete
        Post.destroy(params[:id])

        redirect_to '/list'
    end
end
Get the data via id parameter and delete(Post.destroy) it. Lastly, redirect to /list page.
To add this action to the URL, open config/routes.rb file and modify it like below.
Rails.application.routes.draw do
  ...
  get '/delete/:id', to: 'home#delete'
end
And then, let’s modify list page to call this page. Open app/views/home/list.erb file and modify it like below.
...
<table>
    <thead>
        ...
    </thead>
    <tbody>
        <% @posts.each do |post| %>
        <tr>
            <td><%= post.title %></td>
            <td><%= post.content %></td>
            <td>
                <a href="/modify/<%= post.id %>">modify</a><br/>
                <a href="/delete/<%= post.id %>">delete</a><br/>
            </td>
        </tr>
        <% end %>
    </tbody>
</table>
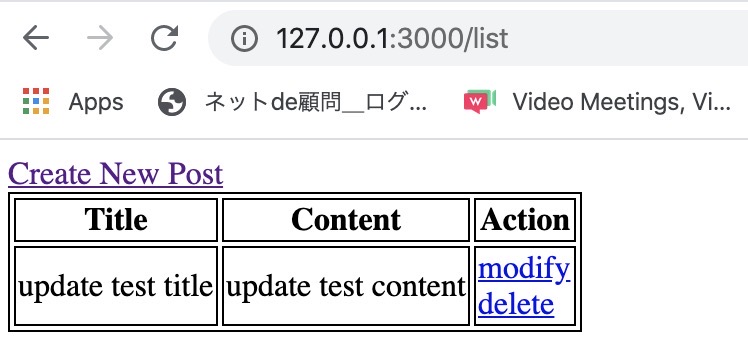
Open http://127.0.0.1:3000/list on the browser again. You can see the delete link is added like below.
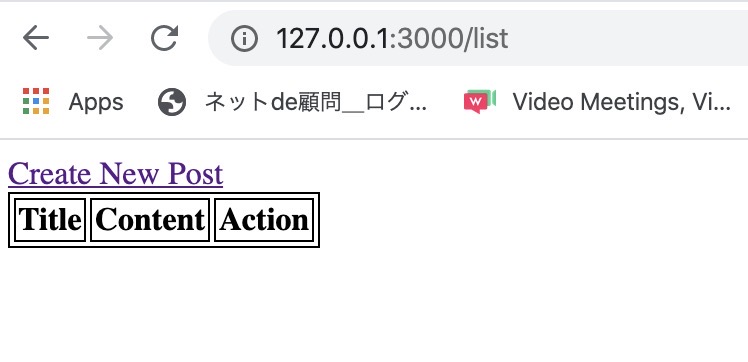
Click delete link. You can see the data is deleted when you click the delete link, and you can see the data is disappeared on the list page.
Completed
In this blog post, we’ve seen how to create the Database in Ruby on Rails and how to do CRUD(Create Read Update Delete) on Rails. Now, you’re ready to develop a web service by Ruby on Rails.
Study Rails deeply while making a web service.
Reference
This blog post is a series. You can see the other posts in below.
- Start Ruby on Rails on Mac
- Folder structure in Ruby on Rails
- Add new web page by Ruby on Rails
- Exchange Data between Controller, View and Route
- Use DB on Rails
Also, you can see the this blog post sample source code on Github
Was my blog helpful? Please leave a comment at the bottom. it will be a great help to me!
App promotion
Deku.Deku created the applications with Flutter.If you have interested, please try to download them for free.


